Watch My Food Grow ~ A South Florida Raised Vegetable Garden

Florida Backyard Raised Vegetable Garden

My First Meal Made With Real Vegetable Garden Food

February 8th, 2009 by Matthew Steinhoff
Respond

Sun Sugar tomatoes on the vine in our backyard vegetable garden.We have been pulling the oh-so-sweet sun sugar tomatoes off the vine and popping them into our mouth since the very first day we planted them. Sarah even grabbed a handful of cilantro for some pulled-pork tacos. But, we hadn’t really made a meal using our garden until Saturday afternoon.

Garden Fresh Jalapenos and Bell Peppers
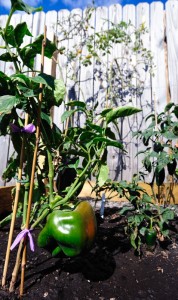
Bell Peppers and Jalapenos Ready For the PickingNachos, in our house, have very few rules. Basically, whatever is in the refrigerator is fair game so long as it is sitting on top of tortilla chips and smothered in cheese. Saturday, we had some leftover rotisserie-cooked chicken, some black beans, week-old refried beans and some kernel corn.

Flush with hunger and inspiration, I went out to my brand new backyard raised vegetable garden and picked two bell peppers, four jalapeno peppers and some pretty ornamental peppers (for color and general pizazz).

How to Make Chicken Nachos Steinhoff Style

The tortilla chips go into the oven at 350 degrees with a layer of Velveeta cheese. (Yes, Velveeta.) The Velveeta acts as a moisture barrier, protecting the chips from the juicy toppings to be added shortly.

All the ingredients go into a skillet where they are heated and seasoned (salt, cracked black pepper and a hot spice of your choosing ).

Chicken Nachos with Garden Fresh Jalepeonos and Green Bell PeppersOnce the Velveeta has melted, take the (now even crispier) chips out of the oven and dump the skillet over the chips. Sprinkle the top of the concoction with shredded (non-Velveeta) cheese. Toss it all back in the oven on broil until the cheese is pleasantly melted.

Serve, still on the cookie sheet on which you baked them, with salsa and sour cream. Keep eating until you feel ill.

Fresh Garden Foods We Have Eaten

I should really be keeping track of how much this garden produces. So, starting today, I’ll keep an updated total of what we have eaten out of the garden. Here is the list thus far:

  • more than a dozen sun sugar tomatoes
  • two green tomatoes
  • half a dozen fairy tale eggplant
  • two bell peppers
  • four jalapenos
  • half a dozen ornamental peppers
  • a fist full of cilantro

I’m also going to keep track of what we have made with our home grown foods. I may not let you know about every meal but I will highlight some specialties or meals made completely from our garden.

—Farmer Matt

Tags: 5 Comments
Backyard Raised Vegetable Garden Construction How-To Instructions

February 5th, 2009 by Matthew Steinhoff
Respond

If you own a circular saw, you can build your own backyard raised vegetable garden. If you just Googled ‘circular saw’ and are still planning to build your own, please google ‘how to reattach fingers’, too.

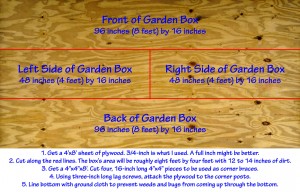
Really, there is nothing to the construction. Cut three long, even strips from a full sheet of plywood, cut one of those strips in half and screw them all together to create a 4’x8′ raised garden box. The steps below took me about four hours and I’m not very good at this sort of thing. No big deal, I swear.

How to Build a Raised Garden Box

Backyard Raised Vegetable Garden Construction How-To Instruction DiagramStep One: Buy your raw materials.

  • one 4’x8′ sheet of plywood
  • I used 3/4-inch pressure treated plywood because that is what I had leftover from hurricane season. Some feel that the wood protecting chemicals will leach into my food and kill me. They may be right. If I was to go out and buy something, I’d probably get one-inch non-treated plywood — the 3/4-inch plywood bows out a bit in the middle from the weight of the soil.

    If your lumber yard isn’t too busy, have them rip the plywood into three, 16-inch wide strips and cut one of those strips in half. I’ll save you time, make it easier to get the wood home and they will do a better job of cutting a straight line than you will.

  • one 4″x4″, eight feet long
  • You’ll need to cut four, 16-inch long pieces to use as the corner supports.

  • 16, three-inch lag screws
  • Drill pilot holes to make your life easier and to keep the wood from splitting.

  • 40 square feet of weed barrier cloth
  • This is the only purchase I made for this project. Everything else, I had left over from other projects. A three-foot wide, 50-foot long roll of weed control fabric cost me $15.47. If you’re more environmentally-minded and prefer to use recycled materials, line the bottom of your box with old newspapers a couple layers deep.

  • 1/4 or 3/8 inch staples (to attach the cloth)
  • I ran the weed control cloth a few inches up the sides of the box and then stapled it to the inside. You could also lay the cloth out flat, set the box on the cloth and then cut it even to the box (so the weight of the box keeps it in place). If that is the case, you may not need staples.

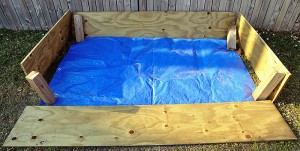
Garden Box Pieces All Laid Out and Ready for AssemblyStep Two: Cut three, 16-inch wide by eight-foot long strips of plywood. Cut one of these strips in half. (See the above graphic and cut along the red lines.)

Step Three: Cut four, 16-inch long 4″x4″ pieces.

Step Four: Organize all the wood as shown on the above photo. Now would be time to have someone help you hold stuff.

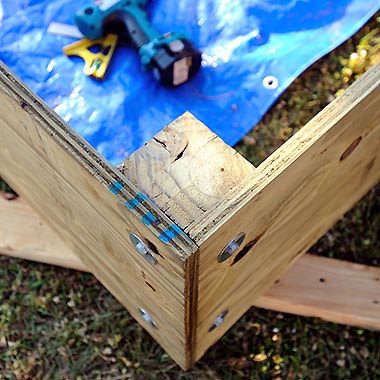
Garden Box Corner Lag Screw DetailStep Five: Drilling pilot holes first to prevent splitting, attach the plywood strips to the 4″x4″ corner posts using three-inch lag screws. Make sure to carefully align the top of the 4’x4′ with the top of the plywood.
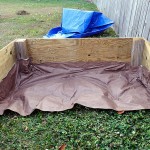
The long plywood strips sit outside (cap) the short plywood strips. This gives the wide side of the box a finished look. If you want the short side as the front, do the opposite.

Weed Control Barrier Partially Installed in Raised Garden BoxStep Six: Attach the weed control cloth to the inside of the box. This is critical. We don’t want grass or bugs attacking from below. A good quality weed control cloth attached well will keep bugs and unwanted plants our for a season or two.

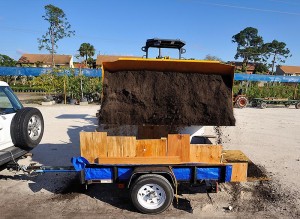
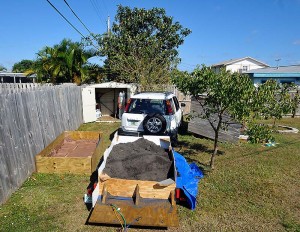
Dirt Cheap: A trailer load of dirt from Art by Nature Garden CenterStep Seven: Get some good quality soil. I paid $20 for bucket-loader full of soil from Art by Nature Garden Center. That was plenty of dirt to fill your 4’x8′ box 12 or so inches deep. Everything I have read says eight to ten inches should be plenty of dirt. My box walls are 16 inches tall so I opted for a deeper garden. Call me an overachiever.

Unloading Soil for My Raised Vegetable GardenStep Eight: In terms of raw, physical labor, this step is the worst of the batch. Unloading that much dirt is a full upper body and abdominal workout.

Hint: unload the when the dirt is dry. As my father learned when he shook hands with sandbags during a Mississippi River flood, dry sandbags weigh less than wet sandbags.

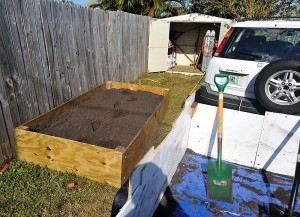
Backyard Garden Box Loaded with Soil and Ready for PlantingStep Nine: Stand back and admire your wonderful new raised vegetable garden.

How Did You Do It?

Do you have a backyard raised vegetable garden that was similarly constructed? If so, drop me a note and, better yet, a picture. I’d love to see what yours looks like.

—Farmer Matt

Tags: 13 Comments

No Frozen Vegetables Last Night

February 5th, 2009 by Matthew Steinhoff
Respond

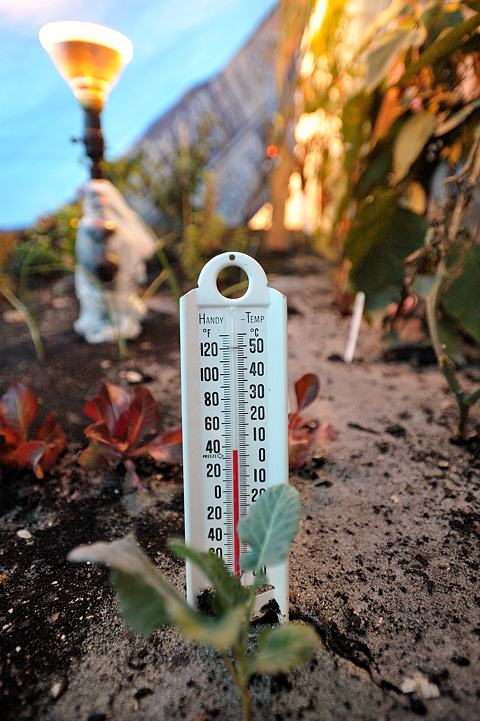
It was cold last night but not too cold, I hope. I checked the thermometer this morning shortly after seven and it was about 37 degrees Fahrenheit under the tarp. Not as warm as I’d like but probably warm enough.

Update: Covering the garden must have helped keep it warm… When Sarah went outside around 9:30 am to water the garden, the hose was partially frozen. It took several minutes of flow before the ice was melted and she had full water volume.

07:00 - The Vegetable Garden Sayed Above Freezing

Tags: No Comments.